Top 10 Tips for Automotive Photography.
Follow our top 10 tips below, and these will help you to become a better automotive photographer:
- Time of the day. (This is particularly relevant if you plan to shoot a vehicle outdoors.)
A great automotive photographer should know to avoid the midday sun where possible. If you can avoid a photoshoot around midday and instead shoot around the ‘Golden Hour’, (which is the period of time shortly after sunrise or before sunset), you will get a softer light, which can prevent parts of a vehicle from being blown out (the term that is used when people refer to a part of an image that does not retain any detail and is overexposed).
Organising a photoshoot around this time will often ensure nicer shadows and emphasise the curves or sleek lines of a vehicle.
Unless the vehicle in question happens to have a matte finish, generally try to think of a vehicle as the back of a spoon.
Vehicles, just like spoons tend to reflect in all directions, and with the harsh midday light, you can quite often get areas of the vehicle that are ‘blown out’ where no details are present, or the colour of the vehicle is simply lost.
Even with a CPL filter, it is sometimes not possible to eliminate all reflections without moving your camera position.
If you have no other option but to shoot at midday, try to look for cover in the location that you choose, under tree’s, or next to a building, for example.
- Lighting.
This may be linked to the time of the day if carrying out a car photoshoot outdoors using natural light; however there is so much more to car photography. Your lighting choice may come down to the style of car photography you choose. You may choose to go for light painting a vehicle, in which case a continuous light source may be used with a long exposure shutter. You may wish to try fine art automotive photography using large softboxes and high-powered flashes to control or kill the ambient light.
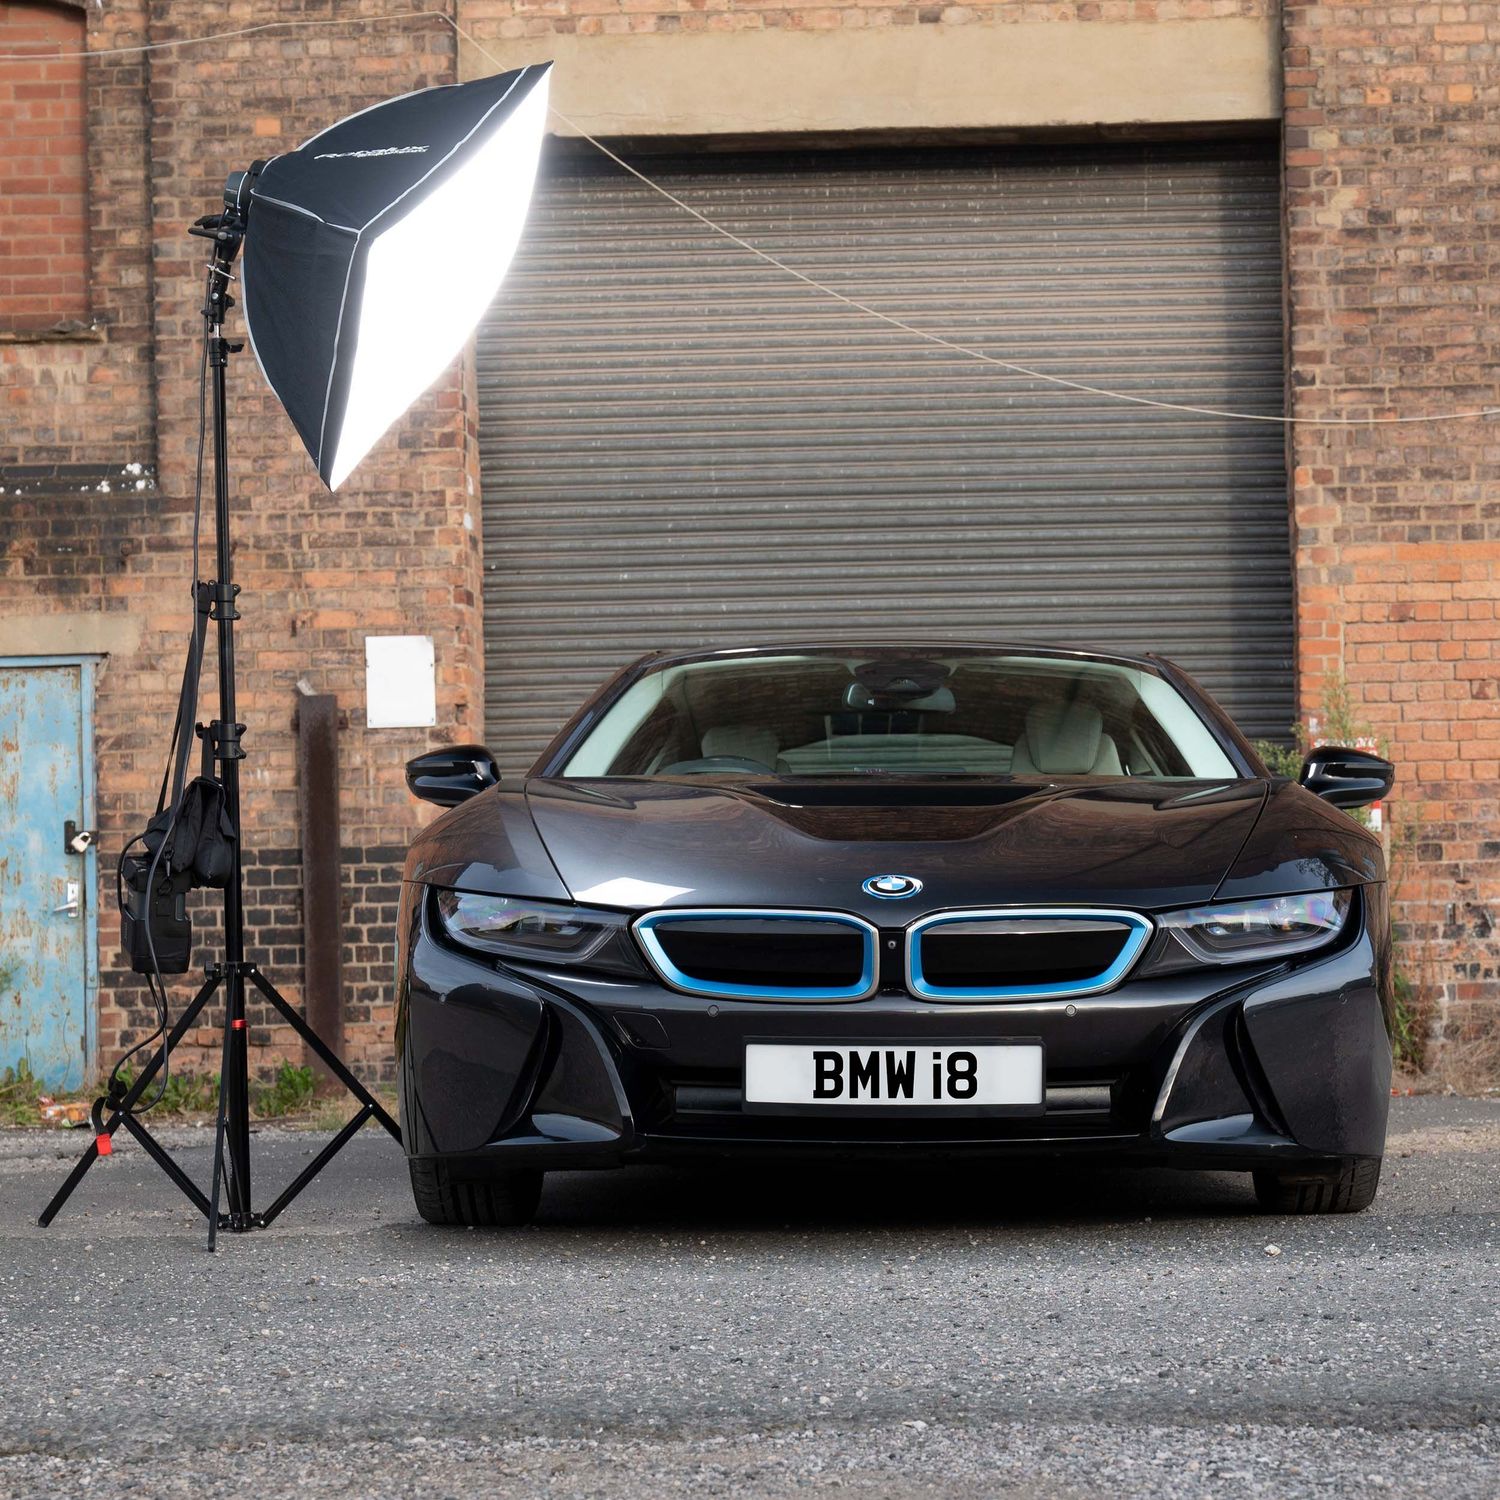
Large Softboxes
A 'Behind The Scenes' (BTS) shot where a large Softbox was used. These can allow you to create and shape light, create shadows, or even to kill the ambient light, meaning only the vehicle you wish to photograph is visible.

Location
A BTS shot of a Land Rover Defender in it's natural surroundings. This shot was taken in board daylight but the harsh lighting was mostly hidden due to where the vehicle was parked, next to, and under some trees and bushes

Reflectors
A BTS shot using reflectors to light areas of a car that are in shadow and not so easy to light. Here the reflector is used to add more light to the right hand side of the rear diffuser and exhaust pipe. Whilst you can lighten this area in post, you are always better to get it right in camera where possible.
- Location.
Scout out locations and try to choose a background that is interesting and relevant to the vehicle you are photographing. Consider you were photographing a 4x4 off-road vehicle, whilst a photograph of this in a field might show the vehicle in it’s true surroundings, the same could not be said in the vehicle in question were say a sports car or superbike.
Quite often, multi-storey car parks can make gritty locations, which can be ideal for a variety of different vehicles, they can also provide cover from the inclement weather we have in the UK.
Please bear in mind that you may need to ask for permission to use this location.
A location can ultimately make or break a photoshoot, depending upon the look you are going for, unless you plan to composite an image.
- Clean the Vehicle - Depending upon the shoot itself, five minutes spent ensuring the vehicle is clean can be time well spent (unless you plan to go for a rugged off-road 4x4 vehicle covered in mud).
Pay special attention to the front of any vehicle you shoot. More often than not, the front of any motor vehicle can often yield no end of dead bugs who have face planted a bonnet or windscreen. It is amazing the level of detail a top quality camera picks up on photographs, things that can easily be missed with the naked eye.
Going the extra mile and having the required tools to clean a vehicle can mean the difference between a quick 5-minute clean versus potentially hours in post-production removing unwanted distractions.
- Lenses - There are no hard and fast rules with regards to lenses; it really depends upon the style of automotive photography you are aiming for and how deep your pockets are.
Some very well respected automotive photographers use a 24-70mm lens of a full-frame mirrorless camera for a lot of their photography. The 24-70mm is a great all-round lens for photographing cars. It is a lens I personally use on most of my car photoshoots, as it allows you to shoot close or go wide with a single lens, and since it’s a zoom lens, you can make adjustments very quickly.
If you want specific lenses for specific styles of car or bike photography, you may want to consider a wide-angle lens. A wide-angle lens allows you to show the vehicle in its full surroundings. Wide-angle lenses can be ideal if you wish to photograph car interiors or for car rolling or rig shots.
A wide-angle lens can also be used to exaggerate the proportions of a vehicle if you wish to accentuate curves.
Consider something similar to a 10-20mm wide-angle lens.
A prime lens could be used for fine art automotive photography, whereby picking up the finer details of the vehicle is your main aim; consider a 35mm f/1.4 or 50mm f/1.4.
For motorsports, consider a 70-200mm lens if you are shooting at a track; this will let you zoom in on the cars, bikes, or trucks from a safe distance. Ensure you maintain a fast shutter speed to reduce motion blur.
A lens with a variable focal length can provide greater flexibility than a prime lens.
- Angle of view - Two factors can affect the angle of view, the angle you choose to shoot from, plus the actual angle of view (in degrees) of your chosen focal length.
The angle you choose is subjective, and unless a client is looking for a particular style, there are no hard and fast rules.
Should you be photographing a muscle or sports car, often a low-down perspective will make things look even more powerful and menacing, whereas for other vehicles you may want to accentuate gorgeous curves and shoot higher up. It ultimately comes down to the brief from your client or personal taste.
The best way to learn what works for you is to experiment; as mentioned previously, there are no hard and fast rules with automotive photography.
- CPL filters - Any experienced automotive photographer worth their salt should have a CPL filter in their photographers armoury. Cars, motorcycles, or any other vehicles can reflect light in many different directions, and a CPL filter allows you to largely control unwanted reflections or highlights.
The difference between the whole side of a vehicle or windscreen being ‘blown out’ and lacking any detail or colour versus the side of a vehicle or windscreen being perfectly in focus, lit, and showing the correct colour, curves, or details is often just a rotation of the CPL filter away.
- Tripod - A tripod is a must when photographing cars or motorcycles. Often you are required to take multiple shots of the vehicle from exactly the same position, such as when using the CPL filter to rotate and ensure you have removed the harsh highlights or reflections.
Ensuring a tripod is used then makes stacking and aligning the images easier in post-production.
- Reflectors - Due to the shapes of different automobiles, more often than not certain parts of the vehicle will be shaded, and this is where reflectors come into their own.
Reflectors can be used to reflect natural or studio-style lighting to accentuate certain areas of a vehicle.
A reflector can be used to reflect light upwards where it would simply not be possible to otherwise obtain the required lighting. They can be used to accentuate car wheels, splitters, or rear diffusers.
A variable reflector with three to five colours offers more flexibility. Aim for something that has at least white, silver, and gold reflectors.
- Get the shot correct in camera - Often the postproductions of images can take far longer than the actual photoshoot itself. Getting the correct composition and exposure Straight Out Of Camera (SOOC) reduces the amount of post-production time and allows you to turn images around quicker.
Click Here to return to our Automotive Page.